
Get started with Cashflow Manager
Simplify your bookkeeping and take control of your business finances with Cashflow Manager, an intuitive software designed for small businesses.


We are here to help!
If you have trouble downloading your file, reach out to us:If you have trouble downloading your file, reach out to us:If you have trouble downloading your file, reach out to us:
Email: [email protected] | Phone: 08 8275 2000 | Go to: Contact us
We know how important it is to have fast and reliable tools to manage your finances efficiently. That’s why we’re so excited to have you onboard Cashflow Manager, your user-friendly bookkeeping software!
Here’s a quick step-by-step guide to get you started with Cashflow Manager, set up your account and start simplifying your bookkeeping:
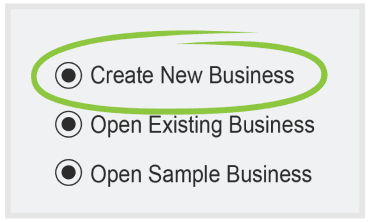
1. Open the Cashflow Manager
program and click “Create New Business” on the home screen.
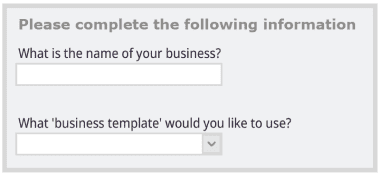
2. Follow the setup wizard to enter your business details like ABN, name, and template.
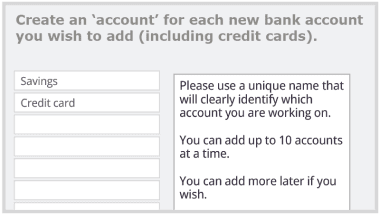
3. Add in your bank account names and details. Use a unique name for each account.
We know how important it is to have fast and reliable tools to manage your finances efficiently. That’s why we’re so excited to have you onboard Cashflow Manager, your user-friendly bookkeeping software!
Here’s a quick step-by-step guide to get you started with Cashflow Manager, set up your account and start simplifying your bookkeeping:

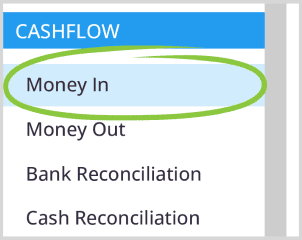
For “Money In” transactions:
1. Select “Money In” from the left menu.
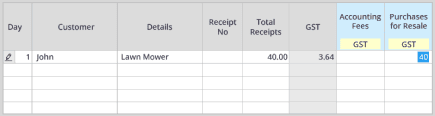
2. Check if you have the correct month/year at the tope.
4. Click “Enter” and you’re done!
To record “Money Out”
1. Choose “Money Out” from the left menu.
2. Double-check month/year.
4. Hit “Enter” to save.
You can customise the “Money In” and “Money Out” columns to suit your business needs. Double-click the account name, then select “Customise” to add, remove or rename columns.
Staying on top of invoicing keeps your cash flow healthy. With Cashflow Manager, creating professional invoices for customers is a breeze.
Follow these simple steps:
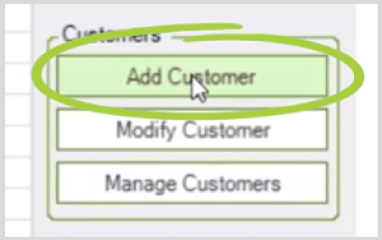
1. From the Customers screen, click “Add Customer”.
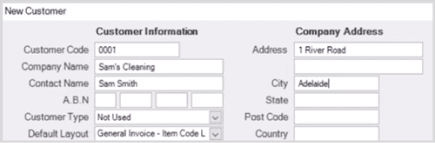
2. Enter their business name, contact details, and address.
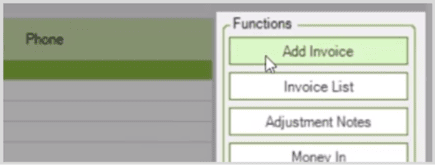
To invoice a customer
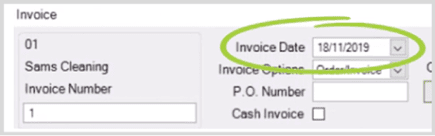
2. Check that the invoice date is correct.
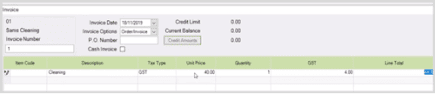
3. Fill out products/services, quantities, taxes, etc.
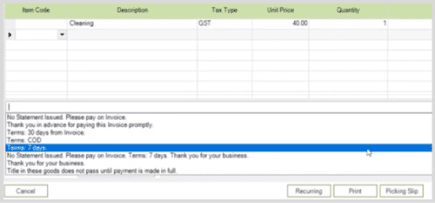
4. Set the payment terms.
5. Click “Save” to send the invoice later or “Finalize” to send now.
6. Choose “Print” to email/save as PDF.
7. Click the invoice and select “Record Payment” once you receive funds.
You can customise the “Money In” and “Money Out” columns to suit your business needs. Double-click the account name, then select “Customise” to add, remove or rename columns.